Keep your small spaces tidy with these 5 super easy yet stylish DIY accessories.
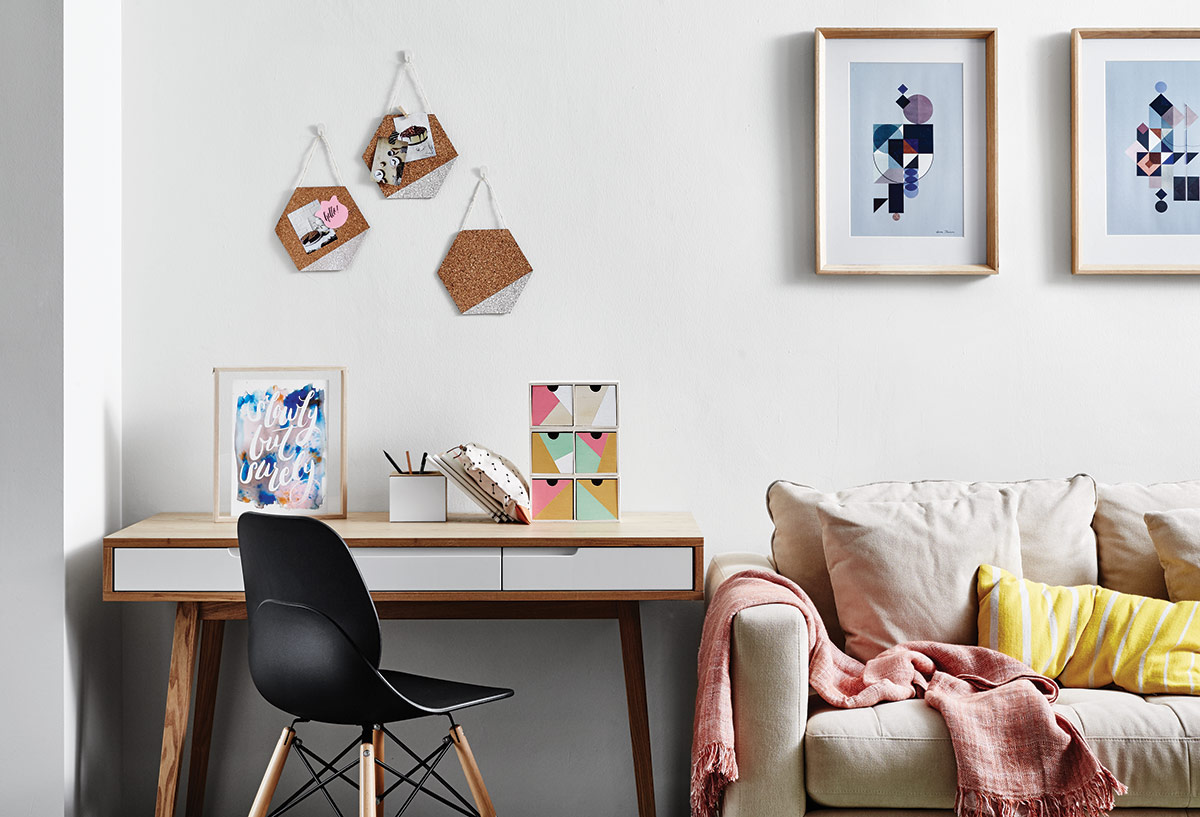
Geometric notice boards
Sure, a conventional notice board gets the job done but why not up the style factor in your home study with these nifty geometric corkboards that double up as a design feature? To make, simply cut a large piece of corkboard into three hexagons using a penknife, then spray a triangular corner with white paint. Secure twine at the top with glue and hang it up using wall hooks.
Key organiser
Never misplace your keys again with this cool key rack! You will need two 30cm-long pieces of wooden planks (we got ours from the craft store). Cut the first plank into five parts with widths measuring approximately 5.5cm each. Then, glue the five pieces on top of the second wooden plank, making sure to leave some gaps between to hang the keys. You will also need to construct special key chains for this key rack. To make, pull thin handicraft rope through your key and secure with large wooden beads at the top so that they can be easily slotted into the key rack.

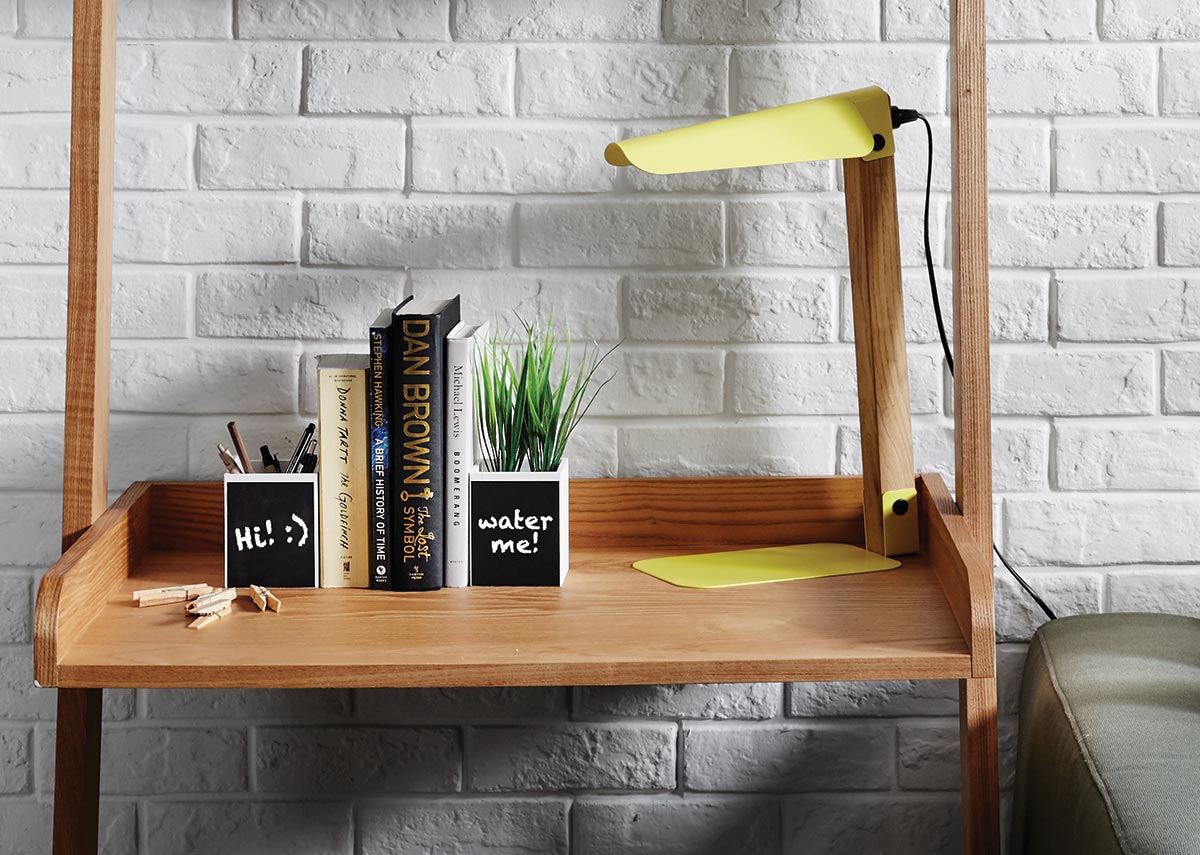
Labelled stationery holders
Add some interest to your desk with this super easy DIY idea: customisable planter-cum-stationery holder. Simply purchase wooden boxes from the craft store and paint them white. Once dry, paste chalkboard sticker on one side.
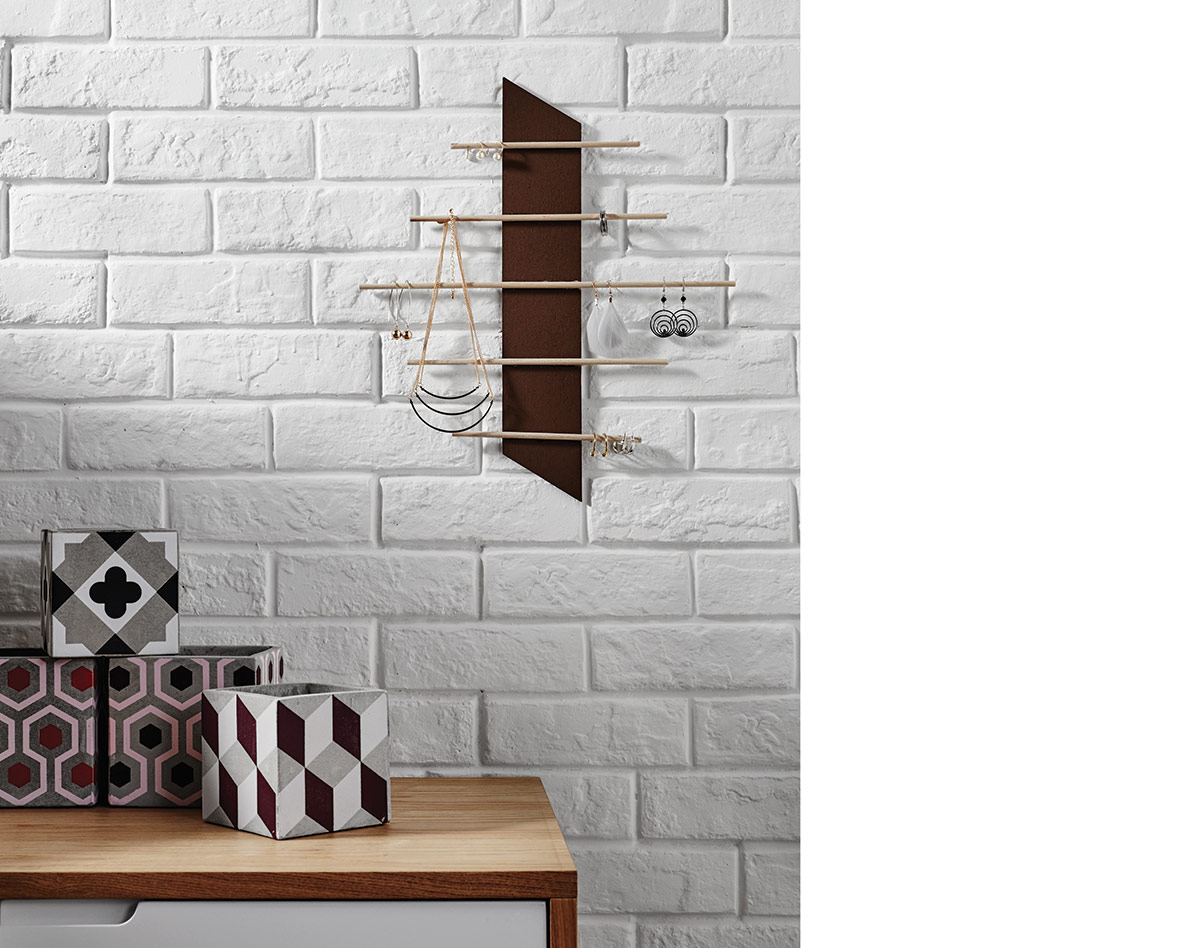
Hanging jewellery organiser
Keep your fashion accessories within easy reach with this chic wall art-meets-organiser trick. For the base, cut the ends of a wooden plank at the diagonal. Then use a wood stain to make it a shade darker. The hanger sticks are made from wooden dowels cut at different lengths, which are then glued onto the wooden plank.
Rope basket
This fancy-looking basket is so on-trend right now but did you know that it’s effortless to make it yourself? Using an oval gift box as a base, create layers by circling the rope around, all while using glue to secure each layer. Stop once you’ve reached your desired height. As for the handles, simply pin leather straps at two ends.

This was adapted from an article originally published in the March 2016 issue of SquareRooms. Photography: Wong Weiliang; craftwork: Geraldine Tan & Linda Setiono; shot on location at HomesToLife.


